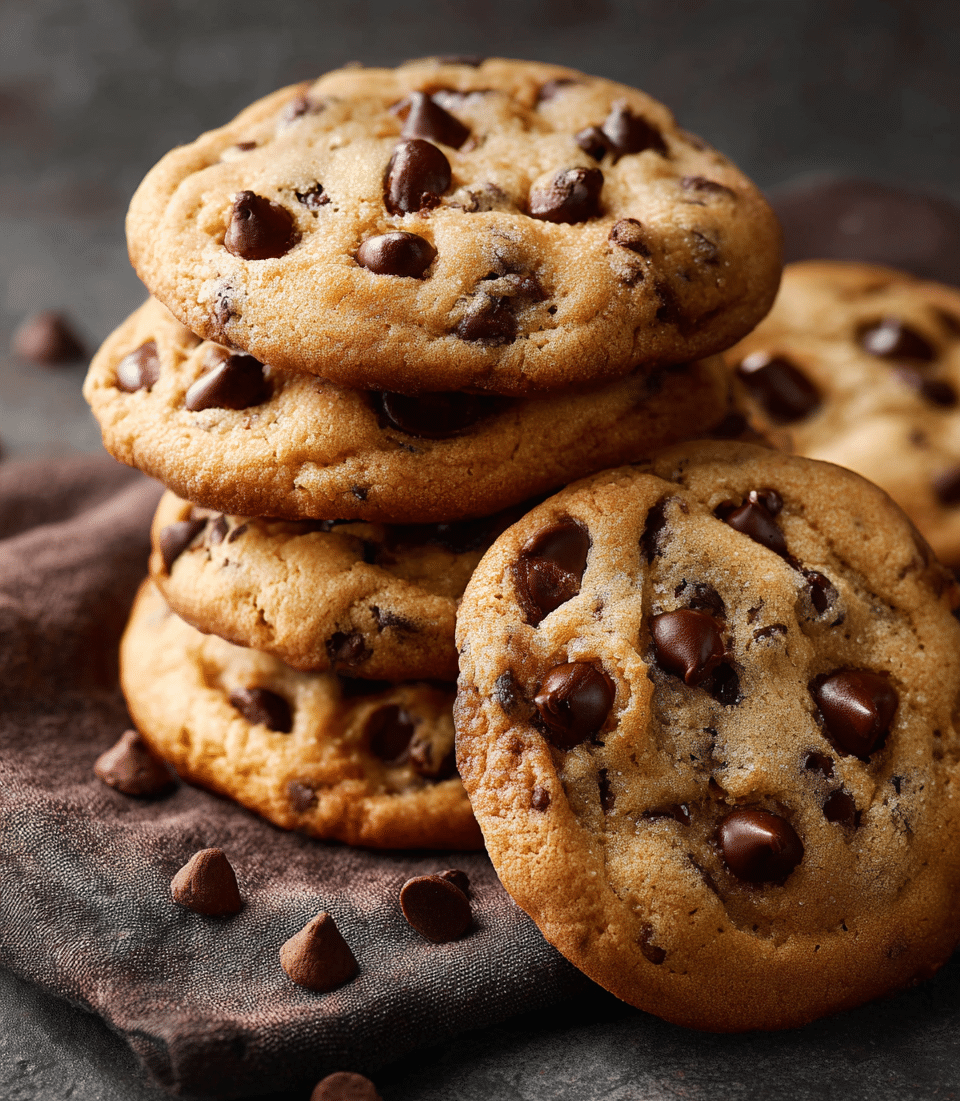
This timeless chocolate chip cookie recipe combines simple ingredients to create a delightful treat. The cookies are characterized by their chewy centers, crisp edges, and generous chunks of chocolate, making them a favorite among cookie enthusiasts.
Ingredients
-
1 cup (2 sticks) unsalted butter, softened
-
1 cup packed brown sugar
-
2 large eggs
-
2 teaspoons vanilla extract
-
2¼ cups all-purpose flour
-
1 teaspoon baking soda
-
1 teaspoon salt
-
2 cups semi-sweet chocolate chips
Directions
-
Preheat Oven: Set your oven to 350°F (175°C).
-
Prepare Baking Sheets: Grease or line your cookie sheets with parchment paper.
-
Cream Butter and Sugar: In a large bowl, beat together the softened butter and brown sugar until light and fluffy.
-
Add Eggs and Vanilla: Beat in the eggs one at a time, then stir in the vanilla extract.
-
Combine Dry Ingredients: In a separate bowl, whisk together the all-purpose flour, baking soda, and salt.
-
Mix Dry into Wet: Gradually add the dry ingredients to the wet mixture, stirring until just combined.
-
Add Chocolate Chips: Fold in the semi-sweet chocolate chips evenly.
-
Shape Cookies: Drop rounded tablespoons of dough onto prepared sheets, spacing about 2 inches apart.
-
Bake: Bake 8–10 minutes, until edges are golden and centers are still soft.
-
Cool: Let cookies cool on the sheets a few minutes, then transfer to wire racks to cool completely.
Nutrients (per cookie)
-
Calories: ~200 kcal
-
Fat: 10 g
-
Saturated Fat: 6 g
-
Cholesterol: 30 mg
-
Sodium: 100 mg
-
Carbohydrates: 30 g
-
Fiber: 1 g
-
Sugars: 20 g
-
Protein: 2 g
Texture & Flavor Profile
Classic chocolate chip cookies deliver a tightrope balance of textures: a gently crisp rim, a tender, almost toffee-chewy center, and pockets of melty chocolate. The flavor lands squarely in the “butterscotch” zone thanks to the reaction between butterfat, brown sugar, and heat, with a saline snap from the salt to keep sweetness in check. When baked just to the moment of light golden edges, the interior remains soft as the cookie cools, firming up into that coveted bend—not crumble—when you break it in half. This profile is the hallmark of an enduring, crowd-pleasing cookie that feels nostalgic yet fully satisfying to modern palates.
The Science Behind a Great Cookie
A memorable cookie is chemistry in disguise. Brown sugar, which contains molasses, is hygroscopic (it attracts and retains moisture), leading to chewiness and deeper caramel notes. When butter meets sugar in a bowl, creaming aerates the mixture by dissolving some sugar while trapping microscopic air. Those air pockets expand in the oven, lending lift and tenderness. Baking soda, activated by the dough’s acidity (from brown sugar and, to a lesser degree, eggs), releases carbon dioxide to encourage spread and lift, while also aiding browning by raising the pH—this promotes the Maillard reaction that creates complexity and that appetizing golden hue. Meanwhile, flour provides the protein (gluten) structure that catches steam and supports the cookie’s shape; too much and the cookie toughens, too little and it spreads thin. Chocolate adds fat and cocoa solids that soften the crumb’s perception and deliver the star flavor notes.
Dialing In Chewy vs. Crispy
If you prefer a chewier cookie, prioritize moisture retention and slower sugar crystallization. Slightly underbake until the edges are set but the center still looks soft; as the cookies cool, carryover heat finishes the job while preserving chew. You can also chill the dough to control spread; cold fat melts more slowly, giving the flour time to set the cookie’s structure before it puddles flat. For a crisper edge, flatten portions a touch before baking and extend the bake by 1–2 minutes, watching carefully to avoid overbrowning. A heavier hand with brown sugar skews chewy; shifting a small fraction toward granulated sugar (without transforming the recipe) nudges the cookie thinner and crisper. Pan type matters too: light-colored aluminum promotes even baking and lighter bottoms, while darker pans encourage faster browning and snappier edges.
Chocolate Choices & Mix-Ins That Matter
Semi-sweet chips are the classic, but the shape and cacao percentage change the experience. Discs, fèves, or chopped bars create “pools” that lace through the crumb, leading to dramatic chocolate swirls and a gourmet look. Chips hold distinct pockets and produce a more dotted, nostalgic aesthetic. A cacao range of 55–66% maintains balance; go higher for bittersweet notes that counter sweetness. For texture, consider replacing up to ¼ of the chips with chopped nuts (toasted pecans or walnuts add buttery crunch) or shards of toffee for added snap. Just keep the total inclusion volume similar to avoid overwhelming the dough’s structure. A pinch of flaky salt on top as the cookies emerge from the oven heightens contrast and makes chocolate sing.
Portion Size, Yield & Appearance
Portioning controls both bake time and texture. Tablespoon-sized scoops bake quickly and give you a large batch of small, lunchbox-friendly cookies with uniformly crisp rims. Slightly larger scoops (about 2 tablespoons) deliver bakery-style cookies with pronounced contrast—chewier centers and caramelized edges. For picture-perfect rounds, portion the dough and chill the scoops; cold portions bake into neat circles. Rotating the pan once during baking can even out hot spots in your oven. If you’re after dramatic crinkles, use a higher-sided sheet and avoid pressing the dough flat; the dough’s rise and fall will naturally fracture the surface into appealing fissures.
Make-Ahead, Storage & Freezing
Cookie dough is one of the most forgiving make-ahead items in baking. Chilling the dough—even overnight—improves flavor as the flour hydrates and sugars dissolve more completely, enhancing caramel notes and yielding a richer color. For convenience, scoop portions onto a parchment-lined tray, freeze until firm, then transfer to a bag or airtight container. Bake straight from frozen, adding 1–3 minutes to the time; the longer cold start helps preserve thickness and chew. Once baked, cookies store well at room temperature for several days in an airtight container. To keep them soft, add a slice of bread or a few marshmallows to the container; both donate moisture to the cookies. For longer storage, freeze baked cookies in a single layer, then stack with parchment between layers. A brief warm-up in a low oven (or a few seconds in the microwave) revives the just-baked feel.
Equipment & Technique Notes
A stand mixer or hand mixer speeds creaming, but a sturdy spatula and elbow grease can also get you there—stop when the butter-sugar mixture looks pale and fluffy. Use parchment to prevent sticking and promote even spreading; silicone mats are reusable and slightly slow browning, which can help if your oven runs hot. For consistent size, rely on a spring-loaded scoop. An oven thermometer is invaluable; many home ovens run 10–25°F off target, which radically affects spread and doneness. Finally, resist the temptation to crowd the pan; proper airflow supports even coloration and texture.
Troubleshooting & Common Mistakes
If your cookies spread too much, the usual culprits are warm dough, overly soft butter, under-measured flour, or an oven that runs hot. Chilling portioned dough is the quickest fix, followed by ensuring you measure flour accurately (stir, spoon, and level rather than scooping directly from the bag). If cookies bake up too puffy and cakey, it may be from over-creaming (too much air), an overly generous scoop of flour, or a cool oven. For greasy bottoms, check that your butter wasn’t melted and avoid placing dough on a warm pan from a previous batch. Tunneling or a coarse crumb often traces to overmixing once flour is added; mix just until combined to avoid overdeveloping gluten. Uneven browning can indicate hot spots—rotate the baking sheet halfway and avoid putting sheets on adjacent oven racks if your oven’s circulation is limited.
Dietary & Allergen-Friendly Swaps
Small, thoughtful substitutions keep the cookie close to its classic spirit. For a gluten-free option, a reputable 1:1 gluten-free baking blend that includes xanthan gum typically yields excellent results; dough may benefit from a brief rest to hydrate the flours fully. For dairy-free, use a plant-based butter with similar fat content to dairy butter and ensure your chocolate is dairy-free. Expect a slightly different spread; chilling helps maintain shape. For egg-free baking, a standard flax “egg” (1 tablespoon ground flaxseed whisked with 3 tablespoons water, rested until gelled) produces a pleasantly chewy cookie with a hint of nuttiness. Aquafaba (whipped chickpea liquid) can also provide structure, though it leans softer. Always verify your chocolate for potential allergens, and when serving, label variations clearly.
High-Altitude & Warm-Climate Adjustments
At elevations above roughly 3,000 feet (900 meters), lower air pressure accelerates rising and moisture loss. To keep cookies from drying and over-spreading, reduce baking soda slightly (by ⅛ to ¼ teaspoon), add a tablespoon or two of flour to reinforce structure, and consider chilling the dough longer. Warmer, humid climates soften butter quickly and can turn dough slack; keep ingredients cool, portion and chill promptly, and bake in smaller batches so sheets don’t heat up. If your kitchen is very warm, place the mixing bowl in the refrigerator between steps to maintain dough integrity.
Serving Ideas, Pairings & Presentation
Chocolate chip cookies are wonderfully versatile on a dessert board alongside fresh berries, roasted nuts, and a bit of sharp cheese (like aged cheddar) for a sweet-savory contrast. For an elegant twist, drizzle a few cookies with melted chocolate and shower with finely chopped toasted nuts. Sandwich two cookies around a scoop of vanilla or coffee ice cream for instant ice cream sandwiches; roll the edges in mini chips or sprinkles for flair. A warm cookie paired with an espresso, malty black tea, or a glass of cold milk remains a timeless pairing. If you’re plating for a dinner party, serve on a warm plate with a small dollop of lightly sweetened crème fraîche to cut richness.
Sourcing & Quality of Chocolate
Chocolate is the soul of this cookie, so quality is a high-leverage choice. Look for cocoa butter as a leading fat and avoid products with excessive stabilizers, which can dull melt and mouthfeel. If you enjoy nuanced flavor, explore blends: half semi-sweet, half bittersweet, or mix brands to layer notes of red fruit, caramel, and roasted cocoa. Chopping a bar with a chef’s knife introduces both shards and fine flecks that disperse chocolate flavor throughout every bite. If you prefer a classic look and reliable structure, standard chips are engineered to hold shape and resist pooling, making them ideal for consistent results.
Texture Tweaks With Simple Levers
A few small adjustments can recalibrate the cookie to your taste. For thicker cookies with plush centers, chill the dough and bake from cold; you can also increase scoop size slightly. If you want more spread and lacier edges, let the dough come to room temperature and use a lighter-colored pan to avoid rapid bottom browning. A brief rest of the dough—anywhere from 30 minutes to overnight—enhances flavor depth; the sugars have time to dissolve more fully, curbing graininess and sharpening caramel notes. If you love a salty-sweet bite, sprinkle a few flakes of sea salt the instant the cookies leave the oven so they adhere without fully dissolving.
Food Safety & Handling
Because the dough contains eggs, avoid tasting it raw unless you use pasteurized eggs and heat-treated flour. To heat-treat flour at home, spread it on a baking sheet and bake briefly at a low temperature, then let it cool completely before mixing; this reduces microbial risk without significantly affecting performance. When storing baked cookies, keep them away from strong-smelling foods (like onions or certain cheeses), as butter readily absorbs odors. If packaging for gifts, include a small card noting the presence of common allergens (wheat, eggs, dairy, chocolate/soy lecithin).
Frequently Asked Questions
How do I keep cookies soft for days? Store airtight and add a slice of bread to share moisture. Keep the container out of direct sun or heat.
Why did my cookies turn out cakey? Likely over-creaming, too much flour, or a cool oven. Mix only until combined after adding flour, and verify oven temperature with a thermometer.
Can I make the dough ahead? Yes—chilling improves flavor. Portion, freeze solid, then store up to two months; bake from frozen with a small time adjustment.
Do pan types really matter? Absolutely. Dark pans brown faster and can over-crisp bottoms; light pans promote even coloration.
What chocolate format gives the best melt? Chopped bars or discs create luscious pools; chips give classic shape and a more uniform bite.
How do I get picture-perfect rounds? Portion with a scoop, chill, then bake. If needed, “cookie scoot” by gently nudging hot cookies into rounds with a ring or spoon edge right out of the oven.
Conclusion
Classic chocolate chip cookies thrive on a simple formula elevated by technique. Thoughtful control of temperature (from butter softness to oven accuracy), strategic chilling, and smart choices in chocolate and panware transform a good cookie into your signature bake. Whether you chase chewy centers or crave crisper edges, the levers are small and accessible: adjust spread with temperature, regulate browning with pan color and bake time, and fine-tune flavor through resting and quality chocolate. Store and freeze with intention to bake fresh on demand, and present them with light finishing touches—like flaky salt or a drizzle of chocolate—to make home-baked cookies feel bakery special. With these insights, you’ll have a dependable, flexible foundation that invites creativity while staying true to the beloved comfort of the classic.


